Introduction to DVC: Data Version Control Tool for Machine Learning Projects
Contents
7.1. Introduction to DVC: Data Version Control Tool for Machine Learning Projects#
Photo by Franki Chamaki on Unsplash
7.1.1. Motivation#
Git is a powerful tool for version control. It allows you to go back and forth between different versions of your code without being afraid of losing the code you change. As a data scientist, you might not only want to control different versions of your code but also control different versions of your data for the same reason: you don’t want to lose the previous data when the data is changed.
But Git is not ideal for database version control because for two reasons:
It is messy to compare the change in different versions of data with Git. I remember that I need to manually accept about 100 lines of data that were changed between 2 commits when using
git pulland it was a painBinary files are usually big. If you commit them to your repository, its size will become much larger. It can also take a long time to commit data to Git.
Wouldn’t it be nice if you can store your data in your favorite storage services such as Amazon S3, Google Drive, Google Cloud Storage, or your own local machine while still being able to switch back and forth between different versions of data? That is when DVC comes in handy.
7.1.2. What is DVC?#
DVC is a system for data version control. It is essentially like Git but is used for data. With DVC, you can keep the information about different versions of your data in Git while storing your original data somewhere else.
Better yet, DVC syntax is just like Git! If you already know Git, learning DVC is a breeze.
Let’s see how to use DVC from example. I will use my repository as an example of this section. You can follow along by cloning the repository.
Start with installing the package
pip install dvc
Find the instruction on more ways to install DVC here.
7.1.3. Get Started#
After DVC is installed, in a Git project, initialize it by running
dvc init
.dvc/.gitignore and .dvc/config is created. Commit this change with
git commit -m "Initialize DVC"
Here is the structure of my data directory
data
├── processed
│   ├── test_text.txt
│   ├── train_label.txt
│   ├── train_text.txt
│   ├── val_label.txt
│   └── val_text.txt
└── raw
    ├── mex20_test_full.txt
    ├── mex20_train_labels.txt
    ├── mex20_train.txt
    ├── mex20_val_labels.txt
    └── mex20_val.txt
To start tracking a file or directory, use dvc add
To track the data directory, use
dvc add data
The information of the added file or directory will be stored in .dvc file nameddata.dvc . This is a small text file that stores information on how to access the original data but not the original data itself.
Since the size of this text file is small, it can be versioned like source code with Git.
Now simply commit the dvcfile as you would with source code. Make sure to add data to .gitignore beforehand to avoid committing the data.
git add data.dvc
git commit -m "add data"
7.1.4. Storing the Data Remotely#
Cool! Now we created a file to store the information about the original data. The next step is to figure out where to store the data
Just like how we usegit add remote to store the URL of the remote repository, we also want to use dvc remote add to store the location of the remote storage.
DVC allows us to store our data on Google Drive, Amazon S3, Azure Blob Storage, Google Cloud Storage, Aliyun OSS, SSH, HDFS, and HTTP. Since I assume everybody has Google Drive, let’s learn how to store our data on Google Drive
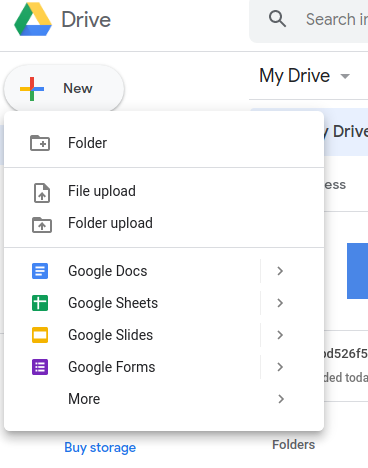
Start with creating a folder on Google Drive
Once we created a folder, our link will be something like this https://drive.google.com/drive/folders/1ynNBbT-4J0ida0eKYQqZZbC93juUUbVH
Simply add that link to DVC to store the location of the remote storage
dvc remote add -d remote gdrive://1ynNBbT-4J0ida0eKYQqZZbC93juUUbVH
-d stands for default. The information about the storage will be saved under .dvc/config
[core]
remote = remote
['remote "remote"']
url = gdrive://1ynNBbT-4J0ida0eKYQqZZbC93juUUbVH
Now simply commit the config file
git commit .dvc/config -m "Configure remote storage"
And push the data to Google Drive
dvc push
That’s it! Now all of the data is pushed to Google Drive. Checkout dvc remote add for more ways to store your data in other storage services.
To push the change we have committed so far to our remote repository, type
git push origin <branch>
7.1.5. Get the Data#
Your data is stored somewhere safe. But now you or your teammates want to access the data, what should you or your teammates do?
It’s straight forward. Just use git pull to pull the change in code like you normally do. Now you have the .dvc file in your local directory.
To retrieve the data, simply type
dvc pull
to pull the data from the remote storage. That’s it!
If you are following in tutorial and you still have the data directory in your local machine, delete it to see how the dvc pullcan retrieve your data from remote storage.
7.1.6. Make Changes#
To make changes, use
dvc add data
git commit data.dvc -m 'Data updates'
dvc push
git push origin <branch>
It is straight forward, isn’t it?
7.1.7. Switch between Different Versions#
The whole point of using DVC is that we can switch between different versions of our data. So how exactly can we do that? Again, just like how we switch between different versions of our code with Git, use dvc checkout to switch between different versions of our data
git checkout <...>
dvc checkout
For example, if we want to switch to the previous version of the data, type
git checkout HEAD^1 data.dvc
dvc checkout
Now when the data reverts to the previous version, use
git commit data.dvc -m "revert to previous version"
to save the change.
Basically, we switch to another version of our code with git chechout. dvc checkout restores the corresponding versions of the .dvc files and directories from .dvc/cacheto the workspace.
Pretty cool isn’t it?