DagsHub: a GitHub Supplement for Data Scientists and ML Engineers
Contents
7.2. DagsHub: a GitHub Supplement for Data Scientists and ML Engineers#
7.2.1. Motivation#
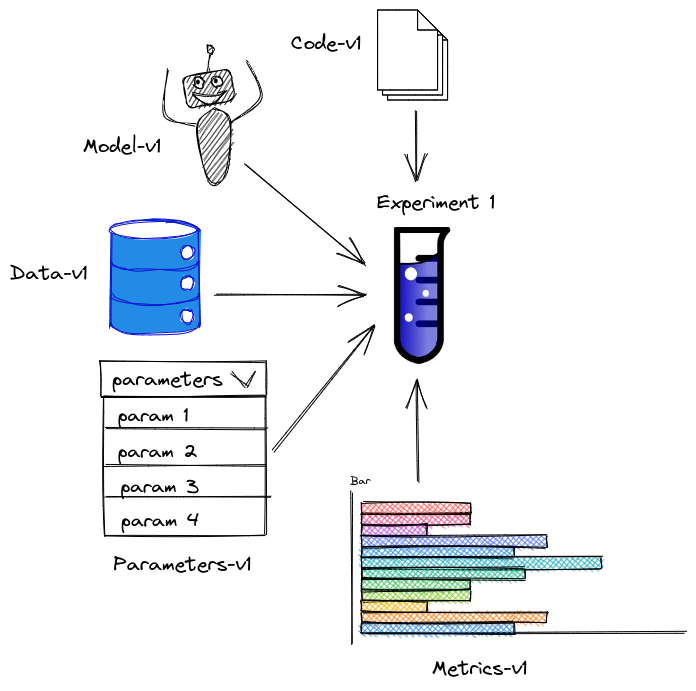
As a data scientist, you might want to version your code, model, data, parameters, and metrics so that you can reproduce a certain experiment.
GitHub is a great platform for version control your code, but it is not ideal to version your data, model, and metrics for two reasons:
GitHub has a strict file limit of 100MB so uploading a medium binary file can easily exceed this limit.
It is messy to compare the change in different versions of data with GitHub. I used to manually accept over 100 changes in data after using
git pull, and it was a pain.
DVC (Data Version Control) is an ideal tool for versioning your binary data. However, you cannot view the DVC tracked files on GitHub.

Wouldn’t it be nice if there is a platform that is similar to GitHub, but is more optimized for data scientists and machine learning engineers? That is when DagsHub comes in handy.
7.2.2. What is DagsHub?#
DagsHub is a platform for data scientists and machine learning engineers to version their data, models, experiments, and code.
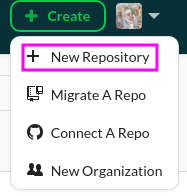
DagsHub allows you to either create a new repository on their platform or connect to a repository on GitHub. If you want to create a new repository on DagsHub, click New Repository:
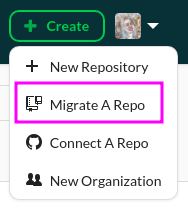
If you already have a repository on GitHub and you want to migrate your repository to DagsHub, click Migrate A Repo:
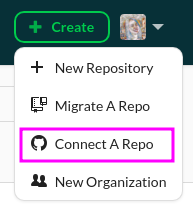
If you want to manage your repository through both GitHub and DagsHub, click Connect A Repo:
The interface of your new repository on DagsHub should look very similar to the interface on GitHub with the addition of some tabs such as Experiments, Data, Models, Notebooks, DVC, and Git.
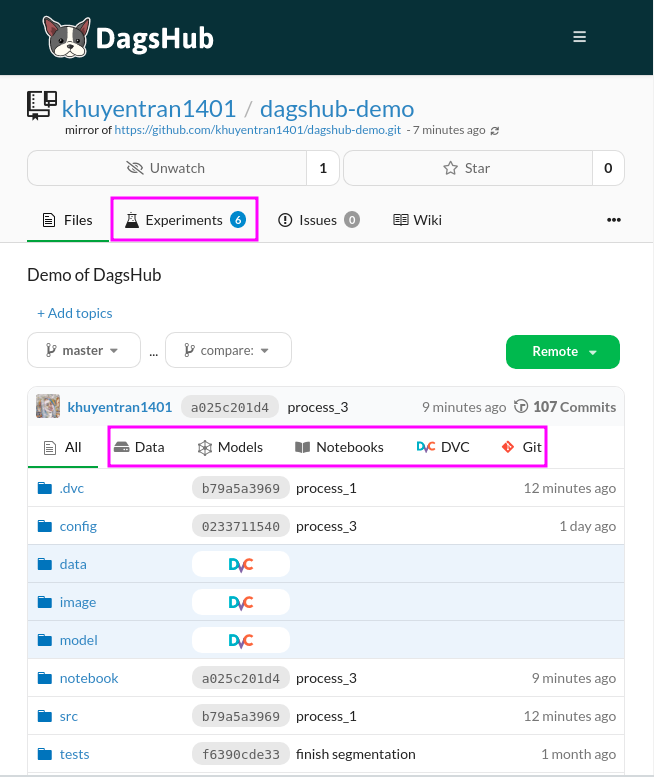
You can check out the repository above here. Let’s explore some functionalities of DagsHub.
7.2.3. Version Your Data and Code#
Assume that you have a local copy of your GitHub repository in your machine, we will use DVC to version your binary data.
Start with installing DVC:
pip install dvc
Normally, when using DVC, you need to use an external storage such as Google Drive, Amazon S3, Azure Blob Storage, Google Cloud Storage, etc. However, with DagsHub, you can store your data directly on the platform.
To upload your data to DagsHub, start with getting the DVC link under the Remote button:
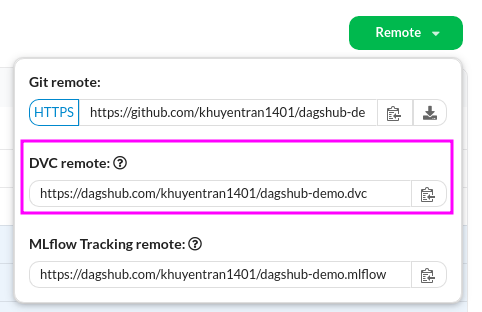
Next, set that link as DVC’s remote storage:
dvc remote add origin https://dagshub.com/khuyentran1401/dagshub-demo.dvc
Add authentication:
dvc remote modify origin --local auth basicdvc remote modify origin --local user DAGSHUB_USERNAMEdvc remote modify origin --local password DAGSHUB_PASSWORD
Next, add the binary data we want to store on DagsHub. For example, to add the directory data/raw , I run:
dvc add data/raw
This command will create a new .dvc file. These are small text files that store information on how to access the original data but not the original data itself.
data
├── raw
│   └── marketing_campaign.csv
└── raw.dvc
Push these files to DagsHub’s storage:
dvc push
Now we can add both changes in data and code, then commit and push your change to GitHub:
git add .
git commit -m 'push data and code'
git push origin master
If you are using GitHub and DagsHub at the same time, you only need to push your files to GitHub. DagsHub will automatically sync with GitHub!
Note: If DagsHub doesn’t sync, click the Refresh icon under the title of the repository:

If you are familiar with DVC, there’s nothing new here. However, the magic happens when you visit your repository on DagsHub.
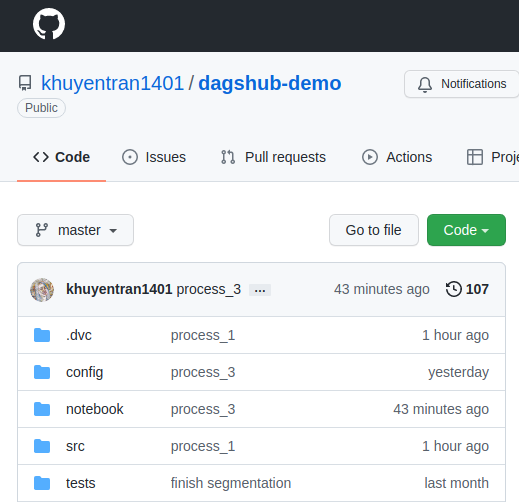
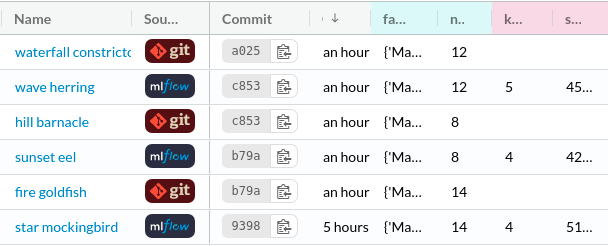
On GitHub, you can see your .dvc files, but not the data itself. This is because the actual data is stored somewhere else:
On DagsHub, you can see both the .dvc files and the data itself because the data is stored on DagsHub!
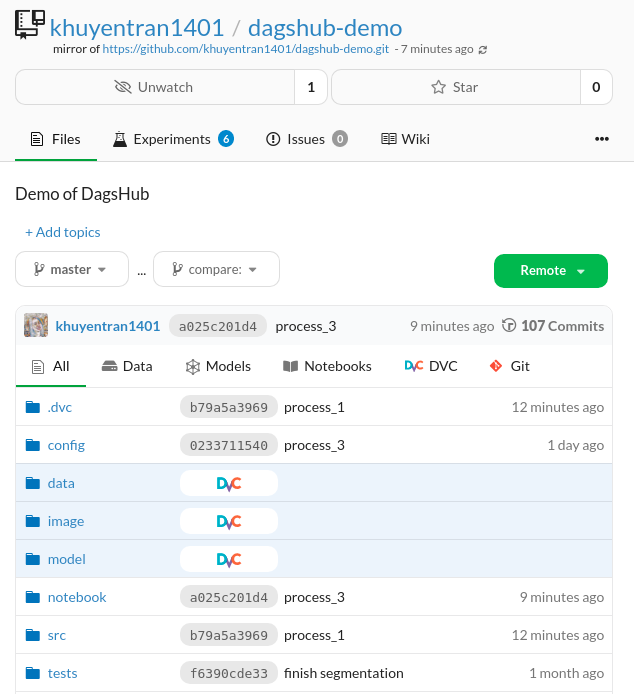
This is very convenient since I can look at both the code and the data within one platform.

7.2.4. Track Experiments#
Libraries like MLFlow allow data scientists to track their experiments along with models and parameters. However, they don’t track the code.
Wouldn’t it be nice if you can save the code, models, parameters, data of an experiment?
That can be easily done with DagsHub. DagsHub allows you to log your experiments with DagsHub logger or MLFlow. Your experiments under the Experiment tab should look like the below:

It is a good practice to use MLFlow to experiment with different parameters quickly without committing your code. Once you find the experiments with good results, you can use DagsHub logger to save the results to open formats (metric.csv, param.yaml) and encapsulate them with the code, model, data that produced it.
Let’s learn how to log your experiment with each of these methods.
7.2.4.1. Log Your Experiments with MLFlow#
MLflow is an open-source platform that allows you to track and compare experiments. To install MLflow, type:
pip install mlflow
In the code below, I use MLFlow to log metrics and parameters.
import mlflow

with mlflow.start_run():

  # code to train model
  ...

  # log parameters
  mlflow.log_params({"model_class": type(model).__name__})
  mlflow.log_params({"model": model.get_params()})

  # code to evavluate model
  ...

  # log metrics
  mlflow.log_metrics(
          {
              "k_best": k_best,
              "score_best": elbow.elbow_score_,
          }
      )
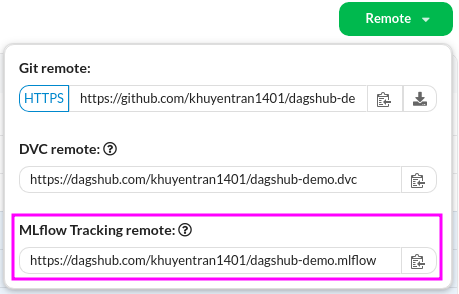
I also set tracking URI to be the URL found under MLflow Tracking remote:
mlflow.set_tracking_uri("https://dagshub.com/khuyentran1401/dagshub-demo.mlflow")
That’s it! Now every time you run your code, the parameters and metrics for each experiment will show up under the Experiments tab of your DagsHub repository:
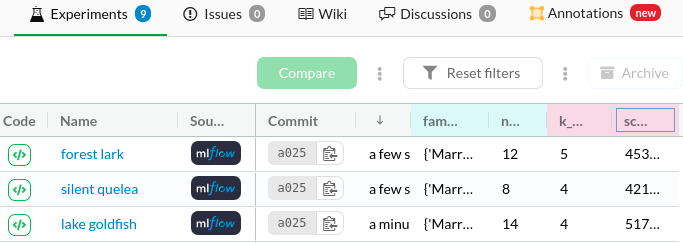
Being able to log your MLflow experiments in a remote server like DagsHub instead of a local database will allow your teammates to have access to your experiments within their browser.
7.2.4.2. Log Your Experiments with DagsHub Logger#
Once you find a good experiment and are ready to log the code, data, and outputs of that experiment, simply switch MLFlow to DagsHub logger.
To use DagsHub logger, start with install DagsHub:
pip install dagshub
Logging your experiments with DagsHub logger is very similar to logging with MLFlow:
from dagshub import DAGsHubLogger

# intialize DagsHub logger
logger = DAGsHubLogger

# log parameters
logger.log_hyperparams({"model_class": type(model).__name__})
logger.log_hyperparams({"model": model.get_params()})

# log metrics
logger.log_metrics(
        {
            "k_best": k_best,
            "score_best": elbow.elbow_score_,
        }
    )
After running your code, DagsHub will automatically create two files metrics.csv and params.yml in your working directory:
.
├── metrics.csv
└── params.yml
Add all changes to the staging area, then commit and push those changes to GitHub:
git add .
git commit -m 'experiment 1'
git push origin master
Now, the new experiment will be logged with Git under the Experiment tab.

7.2.4.3. Use Both MLflow and DagsHub Logger at the Same Time#
Even though it is useful to switch between MLflow and DagsHub logger, I found it inconvenient to rewrite my code every time I want to switch to another logger.
My solution was to create a BaseLogger class whose methods are log_metrics and log_params . Each method will use both MLflow logger and DagsHub logger.
import mlflow
from dagshub import DAGsHubLogger

class BaseLogger:
    def __init__(self):
        self.logger = DAGsHubLogger()

    def log_metrics(self, metrics: dict):
        mlflow.log_metrics(metrics)
        self.logger.log_metrics(metrics)

    def log_params(self, params: dict):
        mlflow.log_params(params)
        self.logger.log_hyperparams(params)
With BaseLogger , I can use two loggers at the same time in one line of code.
import mlflow
from logger import BaseLogger

logger = BaseLogger()

with mlflow.start_run():

  # log parameters
  logger.log_params({"model_class": type(model).__name__})
  logger.log_params({"model": model.get_params()})

  # log metrics
  logger.log_metrics(
          {
              "k_best": k_best,
              "score_best": elbow.elbow_score_,
          }
      )
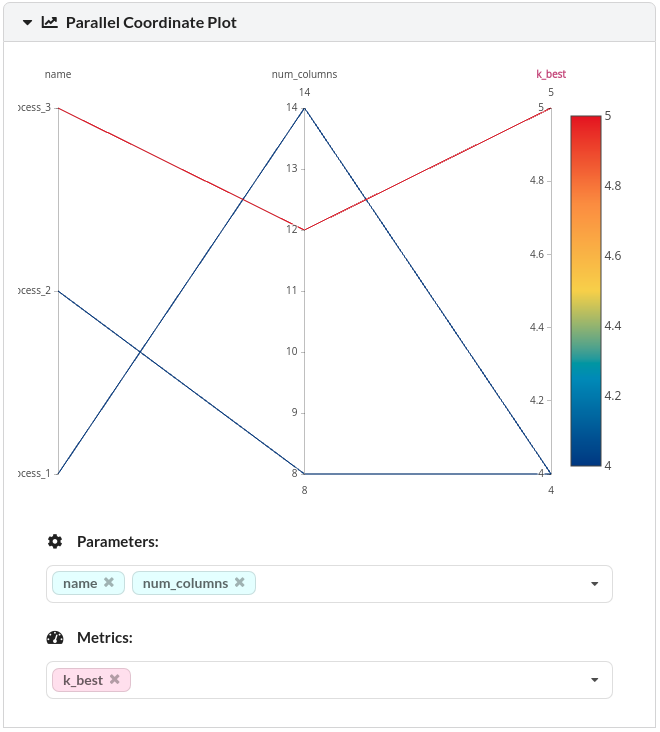
7.2.5. Compare Between MLflow Experiments#
To compare between two or more experiments, tick the boxes of the experiments you want to compare then click Compare.
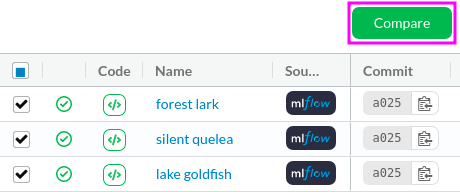
You should see the comparisons of all experiments like below:

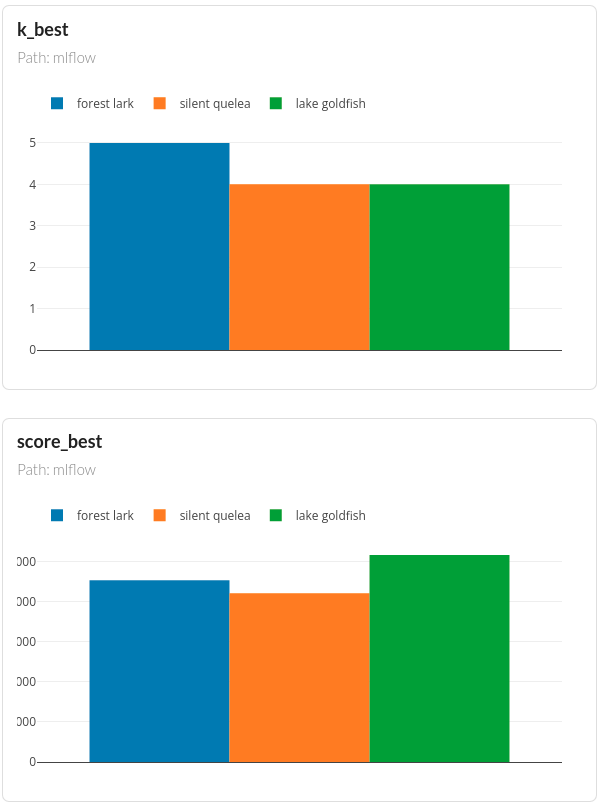
DagsHub also automatically create plots such as parallel coordinate plot and bar plots so that you can observe the relationships between the parameters and the outputs
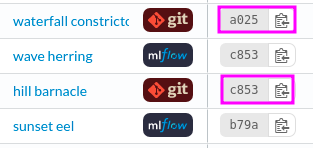
7.2.6. Compare Between Git Experiments#
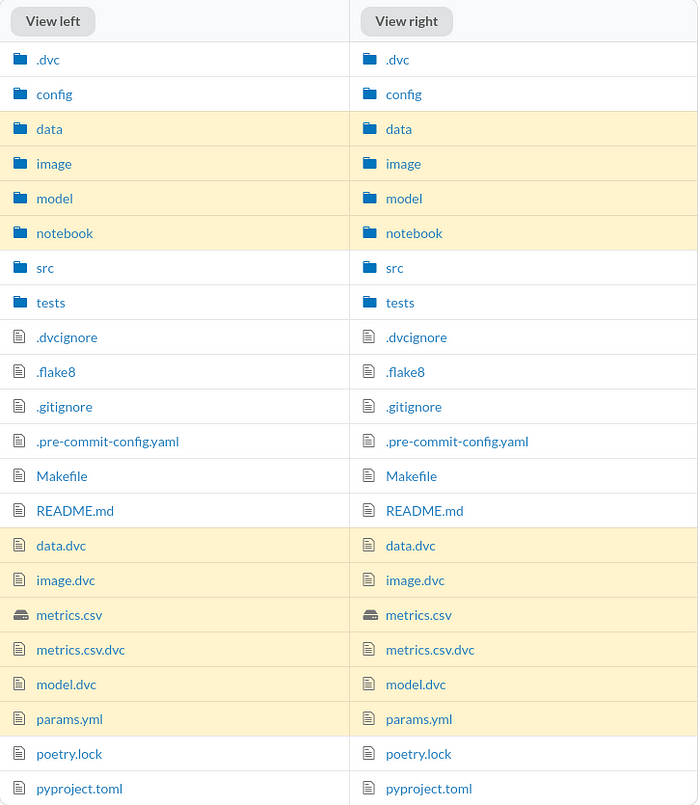
To compare the difference in files between two Git experiments, copy their commit IDs under the Experiments tab:
Then paste each commit ID on each branch under the Files tab:
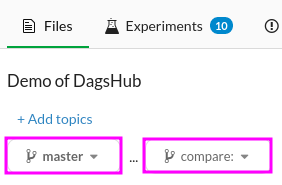
The files that are different between the two commits will be highlighted in yellow.
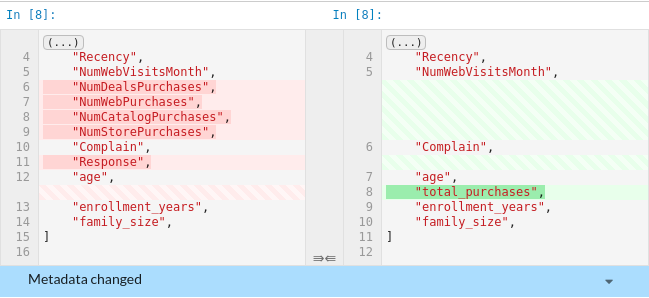
To view the difference, click the files. Since the missing information is highlighted in red and the additional information is highlighted in green, we can clearly see the difference between the two commits.
Better yet, DagsHub provides a nice interface to compare between two Jupyter Notebooks.
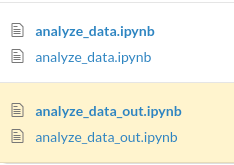
Since data scientists work a lot with Jupyter Notebook, being able to compare the outputs of two notebooks is useful.
7.2.7. Bonus Tip: Create a DVC Pipeline#
Sometimes, you might want others to understand the workflow of your project (.i.e, how the outputs of one script are used for another script). DagsHub allows you to create the visualization of your data workflow through the DVC pipeline.
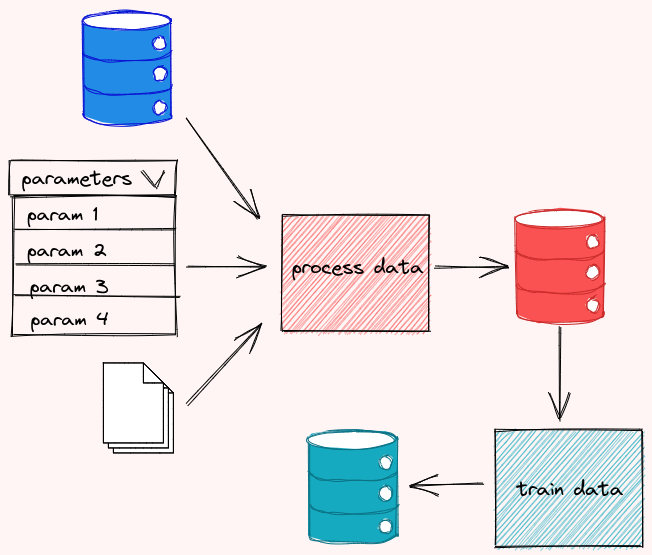
To create a DVC pipeline, start with creating a dvc.yaml file. In the code below, I break my workflow into 3 stages: process_data , segment , and analyze . For each of the stages,
cmdspecifies the command to execute the stagedepsspecifies the dependencies of the stageoutsspecifies the outputs of the stagemetricsspecifies the metrics of the stage
stages:
  process_data:
    cmd: python src/process_data.py
    deps:
    - config/main.yaml
    - data/raw
    - params.yml
    - src/main.py
    - src/process_data.py
    outs:
    - data/intermediate:
        persist: true
  segment:
    cmd: python src/segment.py
    deps:
    - config/main.yaml
    - data/intermediate
    - params.yml
    - src/main.py
    - src/segment.py
    outs:
    - data/final:
        persist: true
    - image:
        persist: true
    - model/cluster.pkl:
        persist: true
    metrics:
    - metrics.csv:
        persist: true
  analyze:
    cmd: python src/run_notebook.py
    deps:
    - notebook/analyze_data.ipynb
    - data/final
All files listed dunder outs are cached, which is similar to what happens when you use dvc add . That’s why you no longer need to use dvc add with those files.
Now you can reproduce the entire pipeline specified in dvc.yaml by running:
dvc repro
Outputs:
Running stage 'process_data':
> python src/process_data.py
Updating lock file 'dvc.lock'

Running stage 'segment':
> python src/segment.py
Updating lock file 'dvc.lock'

Running stage 'analyze':
> python src/run_notebook.py
Updating lock file 'dvc.lock'
Now others will be able to reproduce your results by running the dvc repro command. How convenient is that?
Next, run dvc push to push all of the files tracked by DVC to DagsHub. Use git add and git commit to push the changes in the code and data to GitHub.
If you go to your repository on DagsHub, you should see a nice interactive graph of the entire pipeline on DagsHub!

You can get more details about a node in the graph by clicking that node. Now others can understand your data workflow by just simply going to your repository on DagsHub.