How to Structure a Data Science Project for Readability and Transparency
Contents
2.1. How to Structure a Data Science Project for Readability and Transparency#
2.1.1. Motivation#
It is important to structure your data science project based on a certain standard so that your teammates can easily maintain and modify your project.
But what kind of standard should you follow? Wouldn’t it be nice if you can create an ideal structure for a data science project using a template?
There are some great templates for data science projects out there, but they lack some good practices such as testing, configuring, or formatting your code.
That is why I created a repository name data-science-template. This repository is the result of my years refining the best way to structure a data science project so that it is reproducible and maintainable.
In this section, you will learn how to use this template to incorporate best practices into your data science workflow.
2.1.2. Get Started#
To download the template, start with installing Cookiecutter:
pip install cookiecutter
Create a project based on the template:
cookiecutter https://github.com/khuyentran1401/data-science-template
…, and you will be prompted to answer some details about your project:
Now a project with the specified name is created in your current directory! The structure of the project looks like the below:
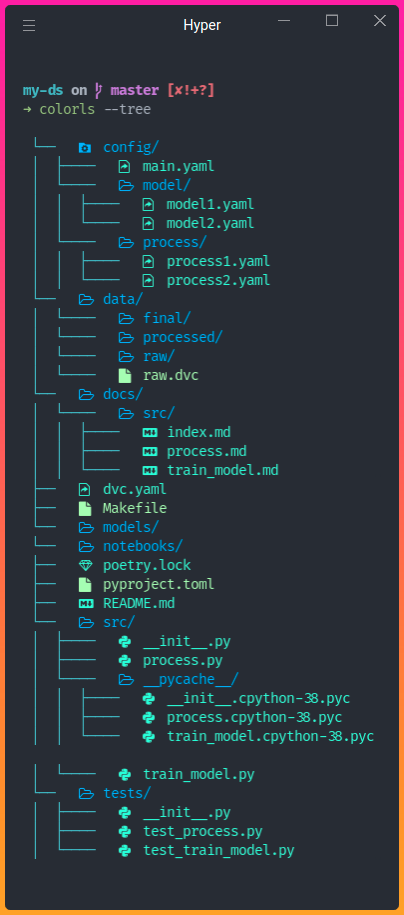
The tools used in this template are:
Poetry: Dependency management
hydra: Manage configuration files
pre-commit plugins: Automate code reviewing formatting
DVC: Data version control
pdoc: Automatically create API documentation for your project
In the next few sections, we will learn the functionalities of these tools and files.
2.1.3. Install Dependencies#
This project uses Poetry instead of pip to manage dependencies since Poetry allows you to:
Separate the main dependencies and the sub-dependencies into two separate files (instead of storing all dependencies in
requirements.txt)Create readable dependencies files
Remove all unused sub-dependencies when removing a library
Avoid installing new packages that are conflict with the existing packages
Package your project in several lines of code
Find the instruction on how to install Poetry here. All main dependencies for this project are specified in pyproject.toml . To install all dependencies, run:
poetry install
To add a new PyPI library, run:
poetry add <library-name>
To remove a library, run:
poetry remove <library-name>
2.1.4. Makefile#
Makefile allows you to create short and readable commands for a series of tasks. You can use Makefile to automate tasks such as setting up the environment:
install:
	@echo "Installing..."
	poetry install
	poetry run pre-commit install

activate:
	@echo "Activating virtual environment"
	poetry shell

initialize_git:
  @echo "Initialize git"
	git init

setup: initialize_git install
Now whenever others want to set up the environment for your projects, they just need to run:
make activate
make setup
And a series of commands will be run:

2.1.5. Manage Code and Tests#
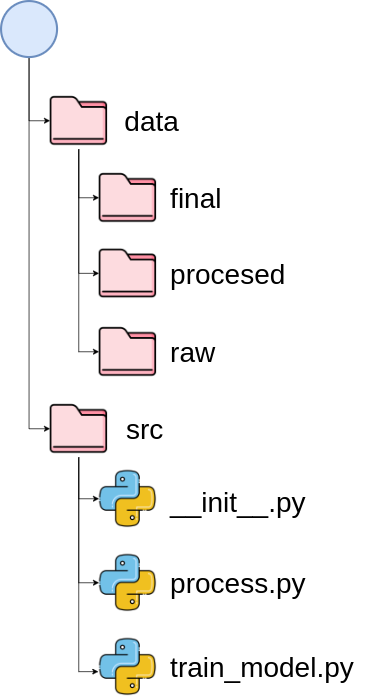
All Python code is stored under the directory src .

All test files are under the directory tests . Each test file starts with the word test followed by the name of the file that is tested.

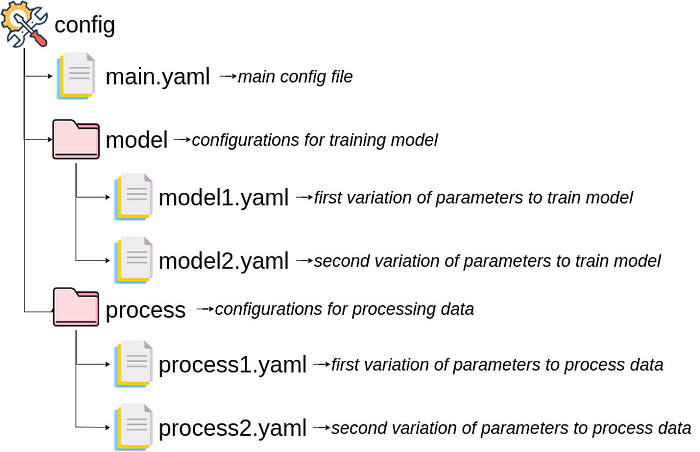
2.1.6. Manage Configuration Files with Hydra#
A configuration file stores all of the values in one place, which helps to separate the values from the code and avoid hard coding. In this template, all configuration files are stored under the directory config .
Hydra is a Python library that allows you to access parameters from a configuration file inside a Python script.
For example, if our main.yaml file looks like below:
raw:
  path: data/raw/sample.csv

processed:
  path: data/processed/processed.csv

final:
  path: data/final/final.csv
…, then we can access the value inside the configuration file by adding the decorator @hydra.main on a specific function. Inside this function, we can access the value under processed and path by using a dot notation: config.processed.path .
"""
This is the demo code that uses hydra to access the parameters in under the directory config.
Author: Khuyen Tran
"""

import hydra
from omegaconf import DictConfig
from hydra.utils import to_absolute_path as abspath

@hydra.main(config_path="../config", config_name='main')
def process_data(config: DictConfig):
    """Function to process the data"""

    raw_path = abspath(config.raw.path)
    print(f"Process data using {raw_path}")
    print(f"Columns used: {config.process.use_columns}")

if __name__ == '__main__':
    process_data()
We will dig deeper into Hydra in the section about configuration.
2.1.7. Manage Data and Models with DVC#
All data is stored under the subdirectories under data . Each subdirectory stores data from different stages.

All models are stored under the directory model .
Since Git is not ideal for version binary files, we use DVC — Data Version Control to version our data and models.
We specify DVC stages in the dvc.yaml file. Each stage represents individual data processes, including their inputs (deps) and resulting output (outs ).
stages:
  process_data:
    cmd: python src/process.py
    deps:
    - config/main.yaml
    - config/process
    - data/raw
    - src/process.py
    outs:
    - data/processed:
        persist: true
  train_model:
    cmd: python src/train_model.py
    deps:
    - config/main.yaml
    - config/model
    - data/processed
    - src/train_model.py
    outs:
    - data/final:
        persist: true
    - models:
        persist: true
All directories and files under outs will be automatically tracked by DVC.
If you want to execute commands defined in their stages, run dvc repro . DVC will skip the stages that didn’t change.

2.1.8. Store Your Data Remotely#
The main benefit of using DVC is that it allows you to upload data tracked by DVC to remote storage. You can store your data on DagsHub, Google Drive, Amazon S3, Azure Blob Storage, Google Cloud Storage, Aliyun OSS, SSH, HDFS, and HTTP.
dvc remote add -d remote <REMOTE-URL>
After adding data to your local project, you can push the data to remote storage:
dvc push
Add and push all changes to Git:
git add .
git commit -m 'commit-message'
git push origin <branch>
We will dig deeper into DVC in the section about data version control.
2.1.9. Check Issues in Your Code Before Committing#
When committing your Python code to Git, you need to make sure your code:
looks nice
is organized
conforms to the PEP 8 style guide
includes docstrings
However, it can be overwhelming to check all of these criteria before committing your code. pre-commit is a framework that allows you to identify simple issues in your code before committing it.
You can add different plugins to your pre-commit pipeline. Once your files are committed, they will be checked by these plugins. Unless all checks are passed, no code will be committed.

In this template, we use 5 different plugins that are specified in .pre-commit-config.yaml . They are:
black — formats Python code
flake8 — checks the style and quality of your Python code
isort — automatically sorts imported libraries alphabetically and separates them into sections and types.
mypy — checks static type
nbstripout — strips output from Jupyter notebooks
To add pre-commit to git hooks, type:
pre-commit install
Now, whenever you run git commit, your code will be automatically checked and reformatted before being committed.

We will dig deeper into pre-commit in the section about code formatting.
2.1.10. Add API Documentation#
As a data scientist, a lot of time you will collaborate with other team members. Thus, it is important to create good documentation for your project.
To create API documentation based on docstrings of your Python files and objects, run:
make docs_view
Output:
Save the output to docs...
pdoc src --http localhost:8080
Starting pdoc server on localhost:8080
pdoc server ready at http://localhost:8080
Now you can view the documentation on http://localhost:8080.
To save all API documentation as markdowns, run:
make docs_save
2.1.11. Conclusion#
You have just learned how to structure your data science project using a data science template. This template means to be flexible. Feel free to adjust the project based on your applications.
Feel free to play with the data-science-template here.